Irrespective of the brand, every mobile is prone to a failure in some way or another and an iPhone is no exception. At the end of such failures, users often face the loss of valuable data starting from contact lists and messages to much more. The ultimate option is to backup iPhone so all your data can never be lost. Moreover, iPhone backup is the prior thing to do when you upgrade your iPhone iOS to the latest version. Out of all the backup solutions available for iPhone, iClouds and iTunes are the backup solutions offered by Apple.
Part 1: Is it Possible to Backup iPhone to iCloud Using iTunes?
There are several measures to backup iPhone using iTunes or iCloud. Sometimes, backing up your iPhone to both the iCloud and iTunes ensures the ultimate safety of your irreplaceable data. Now, the question is how to backup iPhone to iCloud using iTunes or is it even possible to carry out such procedure. The answer is not positive since you can enable the iCloud backup by selecting the settings for your iOS device in iTunes or by enabling directly from the iOS device. So, there is no way to backup iPhone to iCloud through iTunes rather it is better to perform the iCloud backup from the iOS device or from within the iTunes. Scroll down to know more about how to backup iPhone.
Part 2: How to Backup iPhone Using iTunes
Unlike the backup of iPhone using iClouds where there is a limitation to the free space available, iPhone backup using iTunes don’t face quite the same restriction. This procedure stores backups on your Mac or PC. Also, the storage depends on your Mac or PC's available space. To know how to backup iPhone to iCloud on iTunes, any of the two possible procedures can be selected. They are either by connecting an iOS device to the computer or by using Wi-Fi to turn on Wireless Syncing.
Note: Before you decide to follow any of the two methods, make sure to have the latest upgraded version of iTunes. This is how you check – go to Help > Check for Updates.
1. Wireless Sync
Step 1: To backup iPhone using iTunes, make sure that the iCloud is turned off. If the iCloud is not turned off, then follow the steps to turn it off.
- Go to Settings > [Your Name] > iCloud > iCloud Backup
- Toggle iCloud Backup to off.
Step 2: To connect your iPhone to your PC, you need a prompt. Therefore, go to Settings > General > iTunes Wi-Fi Sync.
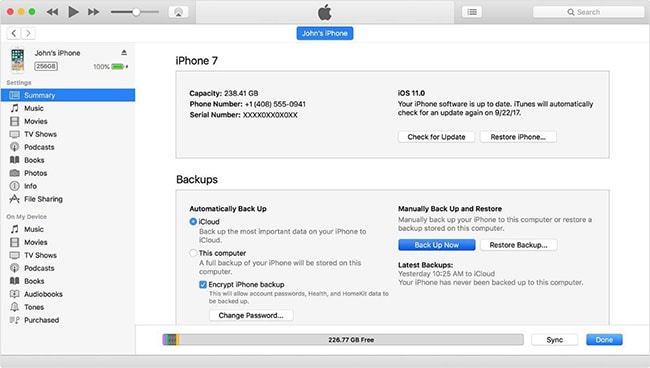
Step 3: Sign into iTunes using your Apple ID. A small iPhone icon will be displayed on the prompt. Click on the icon and then select Summary from the left-side menu bar.
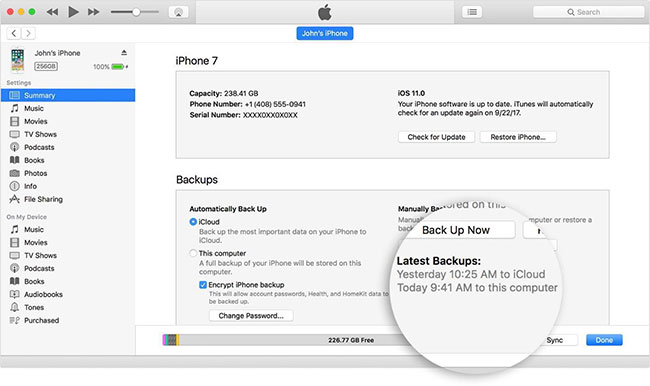
Step 4: Later, click on "Back Up Now" and the process takes place. After the completion of the process, you can check whether the backup is successful or not on the Summary screen under the “Latest Backups.”
2. iPhone backup using iTunes with a cable
Step 1: Connect your iPhone to your PC through a cable and launch iTunes.
Step 2: Click on the small iPhone icon appearing on the screen and select Summary from the menu bar.
Step 3: Choose your options and click “Back Up Now” at the bottom of the screen.
Part 3: How to Backup iPhone Using iCloud
In the method where you backup iPhone to iCloud, the backups are always encrypted, unlike the iTunes. To backup iPhone to iCloud, there is no need for a cable to plug in your device to the system. All you need is an iCloud account to backup iPhone to iCloud wirelessly.
Step 1: First of all, connect your iPhone device to a Wi-Fi network.
Step 2: For the iOS version 10.2 or less, go to Settings and scroll down to click on iCloud. If not, then Go to Settings > [your name] > iCloud.
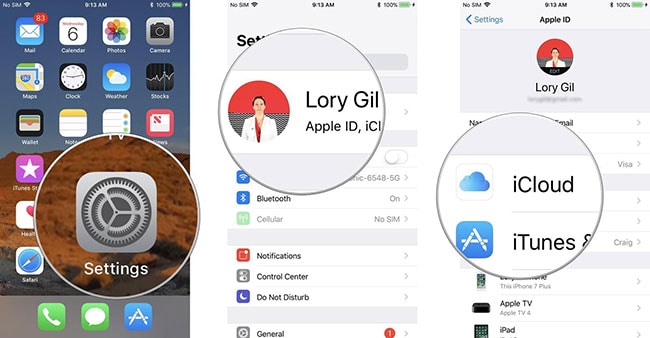
Step 3: Click on iCloud Backup and turn on the iCloud Backup option. For iOS 10.2 or earlier, click on Backup.
Step 4: Click on “Back Up Now” Make sure that your device is connected to the Wi-Fi network until the whole process is complete.

Part 4: How to Seletively Backup iPhone to Computer
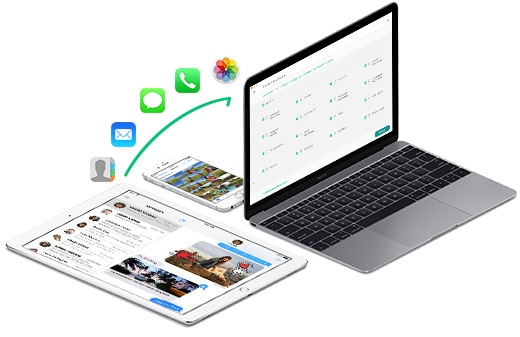
In order to backup iPhone to Computer, the most reliable and effective way is to use iSkysoft Toolbox - iOS Data Backup & Restore. iSkysoft Toolbox is a reliable third-party software that carries out the whole ordeal of ‘backup iPhone to Computer’ without any hassle. This new feature in the iSkysoft Toolbox allows you to backup and export iOS data to your computer from the iPhone device. You can preview and restore any item from the backup to the iPhone device. Below are some of the features of this software.
- Easy-to-use UI interface. It supports innumerable types of files and exports almost all types of file formats.
- This software tool is supported by multiple platforms like Windows iOS - Windows 10/8.1/8/7/Vista/XP, Mac OS - macOS 10.13(macOS High Sierra), 10.12(macOS Sierra), 10.11, 10.10, 10.9, 10.8, 10.7, or 10.6, and all the iOS latest versions.
- Install of backup the whole iPhone, this software allows you to only backup the data you want to the computer.
- When you want to restore to iPhone, you are able to preview the data before restoring.
With the help of this awesome backup and restore program, backup your iPhone to the computer by following the below step-by-step procedure.
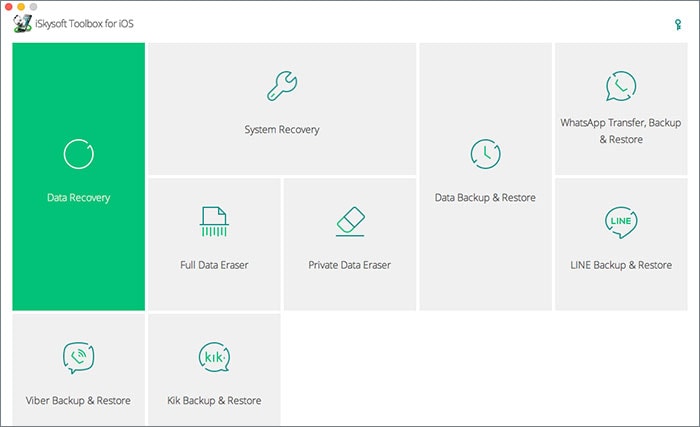
Step 1: Firstly, connect your iOS Device to the computer using a USB digital cable and run the iSkysoft Toolbox. Now, click on “Data Backup & Restore”.
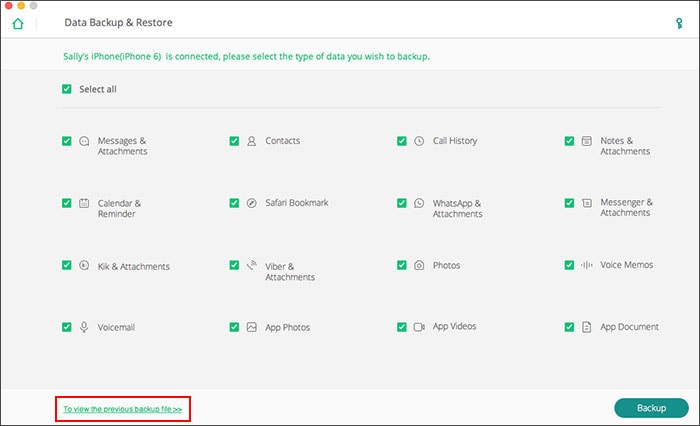
Step 2: Your iOS device will be detected and all the file types will be scanned automatically. Choose the file type to backup and click on “Backup”.
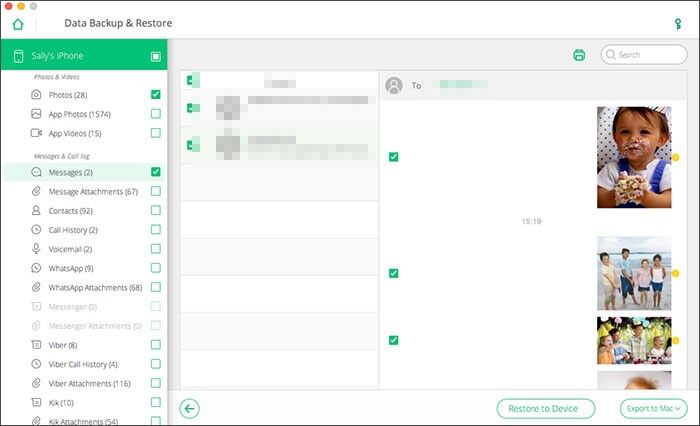
Step 3: The whole process takes some time depending on the data size and once it is completed, you can verify all the backed-up file content. The two options at the bottom, Restore to Device and Export to Mac can be utilized to either export your backup content to Mac or PC or restore back to your iPhone.
For the best protection of your valuable data, it is advisable to opt all the backup options so there will be no scope for any mishaps and to make sure you have a peace of mind even when your iPhone fails.


Any Product-related questions? Tweet us @iSkysoft to Get Support Directly